How Long Does a DIY Mini Split Install Take for a First-Timer?
A first-time DIY mini split install usually takes one to two full days for a single-zone system, assuming the mounting location is straightforward and the electrical work is already handled or completed by a qualified electrician. A confident, well-equipped homeowner might finish the mechanical work in a long day. A half-day mini split install is possible, but it is not a sensible planning assumption for most beginners.
The clock is only part of the job. You also need to plan for wall penetrations, outdoor-unit placement, line-set routing, condensate drainage, electrical requirements, permits, and start-up checks. A mistake in any of those areas can turn a weekend project into a return visit—or a service call.
What “DIY mini split” means in 2026
In 2026, “DIY mini split” generally describes a ductless heat pump or air conditioner sold with features intended to make some installation steps manageable for a homeowner. Many DIY-oriented systems use a factory-charged outdoor unit and a precharged, quick-connect line set. The connection design may avoid some of the refrigerant charging and brazing work required for conventional systems.
That does not mean the entire project is tool-free, permit-free, or automatically legal for a homeowner to complete. You still have to mount and support the indoor and outdoor units, drill the wall opening, route and protect the line set, provide a suitable condensate path, and meet electrical and local code requirements. Some jurisdictions require permits or licensed trades for parts of the work. Check with your building department and read the installation manual for the exact model before buying.
“DIY” also varies by product. Confirm that the package includes the line-set length and fittings you need, and find out what installation steps the manufacturer mini split electrician cost expects you to perform. A quick-connect fitting is not a substitute for following torque, routing, leak-check, and start-up instructions. If the system requires conventional refrigerant work, do not treat that as a casual DIY task; refrigerant handling is regulated, and the work may require a qualified technician.
Realistic first-time mini split install time
For a simple, single-zone installation—one indoor head, a nearby outdoor unit, an accessible exterior wall, and no major electrical complications—plan on roughly 10 to 16 hours of hands-on work. That is often spread over a weekend. A difficult route, masonry wall, long line set, or unexpected electrical work can push the project beyond that range.
Installation task First-timer planning range What can add time Planning, measuring, and checking clearances 1–2 hours Unsure wall structure, unit placement, or local permit rules Mounting the indoor bracket and drilling the wall 2–4 hours Brick, concrete, awkward stud spacing, or a high mounting location Setting the outdoor unit and routing the line set 2–4 hours Long route, tight bends, elevated mounting, or a crowded side yard Condensate routing, sealing, and weatherproofing 1–2 hours Drain route uphill, difficult exterior access, or drainage corrections Electrical work, inspection, and start-up 1–3+ hours, excluding hired work New circuit, disconnect, permit, electrician scheduling, or troubleshootingThese are planning estimates, not promises. They also do not include time spent arranging a permit, waiting for an electrician, or correcting a poorly chosen location. If you are installing a unit in a garage, for example, think through vehicle clearance, the outdoor unit’s airflow, and whether the garage is an appropriate space to condition. In a bedroom, consider indoor-unit sound, airflow direction, and whether the line set can reach the outdoor unit without an awkward path.
Why a half-day mini split install is the exception
A half-day mini split install is most plausible when the installer has done similar work before, the site is already prepared, the electrical supply is ready, the wall is easy to drill, and the line-set route is short and uncomplicated. A first-timer is likely to spend extra time measuring twice, finding studs, leveling the mounting plate, and checking that the wall sleeve slopes correctly for drainage.
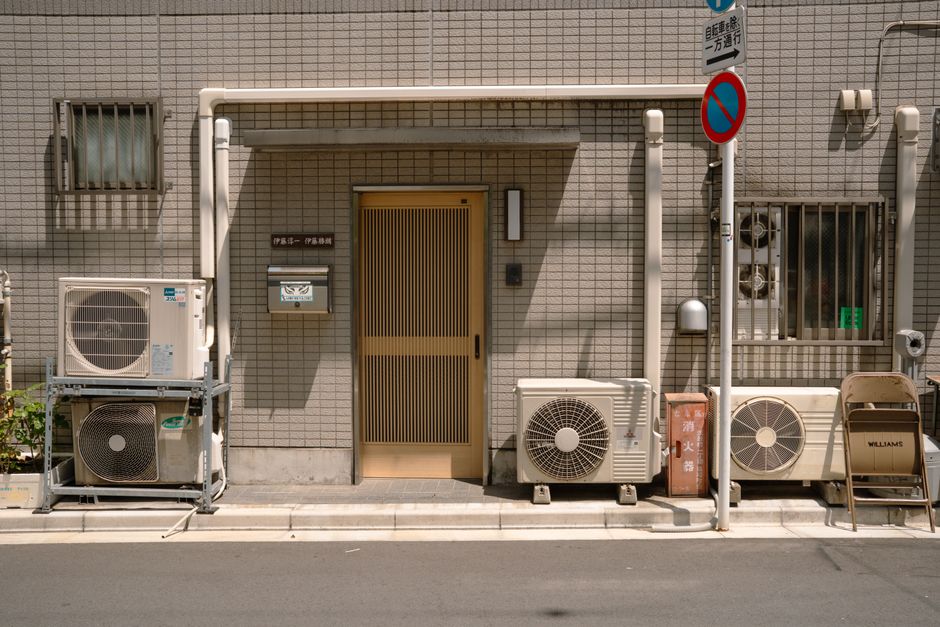
One commonly underestimated chore is handling the line set. It may arrive longer than the route requires, and excess line cannot simply be crushed behind the indoor head or bent into a tight coil. Follow the manufacturer’s minimum bend radius and routing guidance; tight bends can damage the tubing. Any extra length needs a suitable, neat path with the specified support and protection. Coiling excess line set can be an installation headache, especially when there is little room beside the outdoor unit or on a visible garage wall.
Do not rush the wall penetration, either. The opening has to accommodate the lines and drain while preserving the intended slope and weather protection. Before drilling, check for wiring, plumbing, structural members, and exterior obstructions. A hole in the wrong spot is a much longer problem than a slow afternoon with a stud finder and a careful layout.
DIY mini split time: a practical project sequence
- Verify the system and rules. Confirm sizing, model requirements, included parts, warranty terms, electrical specifications, and local permit requirements.
- Choose locations. Check indoor airflow and service access, outdoor clearances, noise, drainage, and the shortest practical line-set route.
- Prepare the electrical plan. Compare the nameplate and installation manual with the home’s supply and circuit requirements. Arrange an electrician if needed.
- Mount the indoor plate and drill. Level the bracket, verify the wall structure, and make the opening at the specified location and angle.
- Set the outdoor unit and route the lines. Use an approved pad or bracket, protect the tubing, and avoid kinks or unsupported runs.
- Connect, seal, and drain. Follow the exact fitting instructions, secure the line set, seal the wall opening, and verify that condensate drains as intended.
- Complete electrical and start-up checks. Follow the manual and local code, then test operation in the appropriate mode and check for abnormal sounds, leaks, or drainage issues.
Google Assistant may be available for control on some connected models or through a compatible controller, but smart-home support is model- and setup-dependent. Treat it as a convenience feature, not a substitute for correctly sizing and installing the system. Confirm the exact compatibility details before purchase.
MRCOOL, Zone Air, and the value tradeoff
MRCOOL is a familiar name in the DIY mini split category, and its DIY-branded systems are designed around features intended to simplify installation. That convenience may be valuable if you want to handle much of the mechanical work yourself, but it does not erase the need to check code, electrical requirements, installation instructions, or warranty conditions. Read the documentation for the exact system rather than assuming every model has the same connections, included line-set length, or coverage.
When comparing MRCOOL with Zone Air, look at the complete installed cost and support package, not just the equipment price. A Zone Air option may be attractive if its specific package, dealer assistance, or installation support better fits your project; an MRCOOL DIY system may offer better value if its included components and homeowner-oriented installation approach match your site. The right answer depends on the exact model, what is in the box, shipping, electrical work, and how you value professional help.
Compare Questions to ask before choosing Equipment and included parts Are the line set, wall sleeve, bracket or pad, and required accessories included? Installation support Is phone or technical support available, and what is the process if a fitting or control issue appears? Warranty Does DIY installation affect coverage? Are registration, professional start-up, or maintenance conditions specified? Project cost What will the electrician, permits, tools, delivery, and any finishing work add?Reviews can help you spot recurring customer-service themes, but they do not settle whether a product is right for your house. If you consult Trustpilot, look specifically at mrcool.com reviews and read a range of recent experiences rather than relying on a single score. Pay attention to what customers say about the particular model, installation support, warranty handling, and how a problem was resolved. A warranty claim is not always effortless: keep invoices, model and serial numbers, registration records, and installation documentation.
Cooper&Hunter is another brand a buyer may encounter while comparing ductless systems. Compare its specific model against the MRCOOL or Zone Air option on capacity, cold-weather output, efficiency, included installation components, support, and warranty—not on brand reputation alone.
SEER2 efficiency: connect the number to the bill
SEER2 is a seasonal cooling-efficiency rating. A higher SEER2 generally indicates less electricity used for a given amount of cooling under the rating procedure, but it does not predict your exact bill. Real consumption depends on your climate, thermostat settings, room heat gain, insulation, equipment sizing, installation quality, and how many hours the system runs. Compare the certified SEER2 ratings of the exact models you are considering; “high efficiency” without a number is not useful enough for a buying decision.
For a rough comparison, annual cooling cost can be estimated as:
Annual cooling cost = estimated annual cooling electricity use (kWh) × your electric rate per kWh.
To estimate the electricity use, use a credible load or energy estimate for your home and compare equipment under similar conditions. Do not assume that a higher SEER2 unit will repay a large price premium quickly in a lightly used guest room or garage. It may matter more in a bedroom or living space that runs through long, hot summers. A mini split also provides zoned control, so heating or cooling one occupied room rather than an entire duct system can affect the household’s total use—but only if the equipment is sized and used sensibly.
Cold-climate performance and “Hyper Heat”
Cold-weather heating is not captured by SEER2 alone. Check the model’s heating specifications, including its rated heating capacity at low outdoor temperatures and the manufacturer’s stated operating limits. Some equipment is marketed for cold-climate heating; “Hyper Heat” is a name associated with particular product lines, not a generic guarantee that any mini split will maintain full output in severe cold.
Ask for the temperature-specific capacity data, not just a headline minimum operating temperature. A unit may continue running at a low temperature while delivering less heat than your room needs. In a bedroom or garage used as a workshop, that difference matters on the coldest days. Also consider defrost cycles, backup heat, insulation, and whether the local climate calls for a system designed for low-temperature performance. Verify the exact model data and installation requirements before choosing.

How to keep the project on schedule
- Read the full installation manual before unpacking the system.
- Confirm local permits and electrical requirements before setting an installation date.
- Measure the line-set route and check the package contents against the manual.
- Have a helper available for lifting and positioning; do not improvise unsafe support.
- Allow time for sealing, drainage checks, and careful start-up rather than aiming for a photo-ready finish by lunch.
- Stop and call a qualified installer or electrician if the work exceeds your skills or the manual’s instructions.
The bottom line
For a first-time mini split install, plan on a weekend rather than a half day. A straightforward single-zone DIY project may take 10 to 16 hours of hands-on work, while difficult access, electrical upgrades, permits, and line-set routing can add substantially more time. MRCOOL, Zone Air, and Cooper&Hunter are worth comparing by exact model, support, warranty, and total project cost. Check SEER2 and low-temperature heating data for the rooms you actually use, and treat “DIY” as a description of an installation approach—not permission to skip code, safety, or careful planning.